

Report Settings
In PentestPad, you can manage your report templates on the /admin/report-templates page. Alongside uploading new templates, you can also replace, download and delete existing ones. You can also configure report title formats and manage additional custom fields.
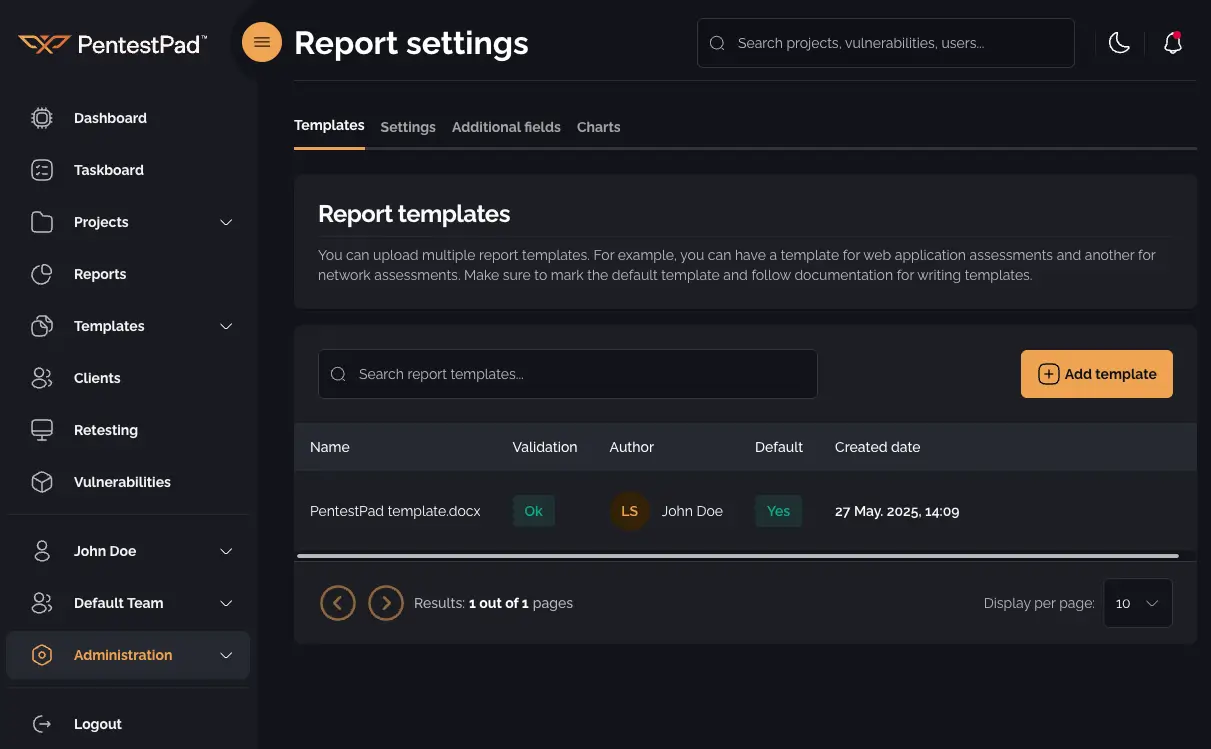
Navigating to the Report Templates page
Section titled “Navigating to the Report Templates page”Open the sidebar navigation menu, expand the Administration dropdown, and select Reporting.
View existing templates
Section titled “View existing templates”Once you are on the Report Templates page you can view all of your templates inside the table. You can also search the templates by name.
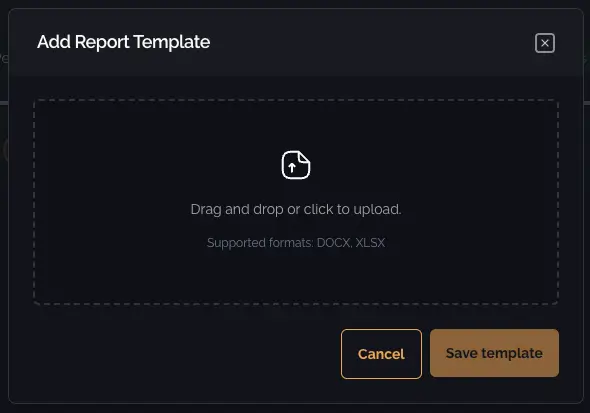
Adding a new template
Section titled “Adding a new template”To add a new template, click the Add template button to open a modal where you can drag and drop a template file. Currently supported formats are DOCX and XLSX.
After selecting your file, click Save template to upload it.
Template validation
Section titled “Template validation”After uploading a template, the validation status will appear in the Validation field in the table. If the validation passed, you will see “Ok”. Otherwise, when you hover over “Missing fields”, a tooltip will appear showing which Finding fields or Report fields are missing inside the template.
Managing existing templates
Section titled “Managing existing templates”By hovering over the desired row in the table, you can:
- Click Make default to set it as the default template
- Click the Replace button (rotate icon) to open a modal where you can drop a different template (same process as adding a new one)
- Click the Delete button (trash icon) to open a confirmation modal
- Click the Download button (file download icon) to download the template
Report title format settings
Section titled “Report title format settings”On top of the page in the navigation, you can navigate to the Settings page at /admin/report-templates/settings where you can select a template and change the format of the report title when using that template. You can also view the list of available placeholders by clicking on the Check the list of available placeholders.
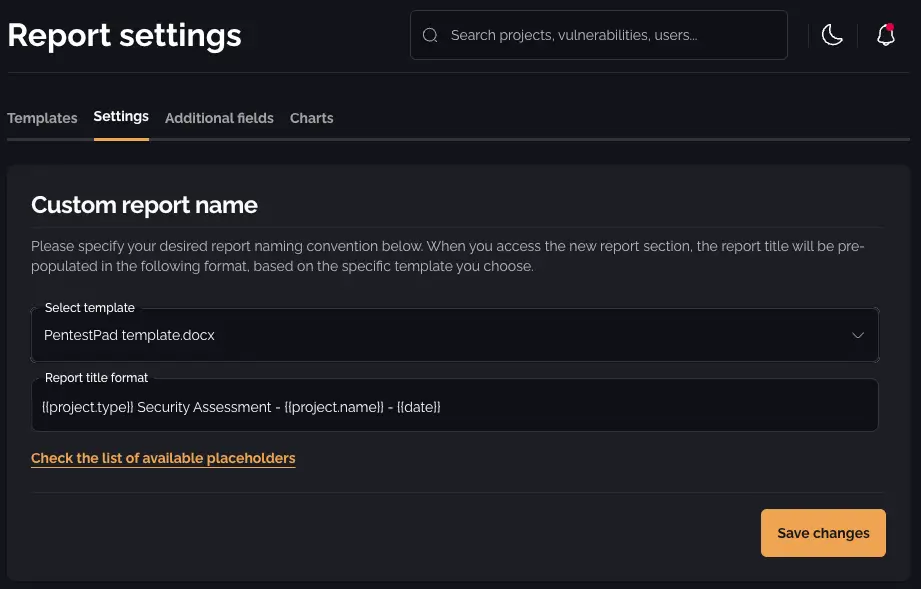
The currently available placeholders are:
{{project.name}}- Project’s name{{project.type}}- Type of a project, for example “Web Application”{{date}}- Date when report is generated, for example “31-13-2012”
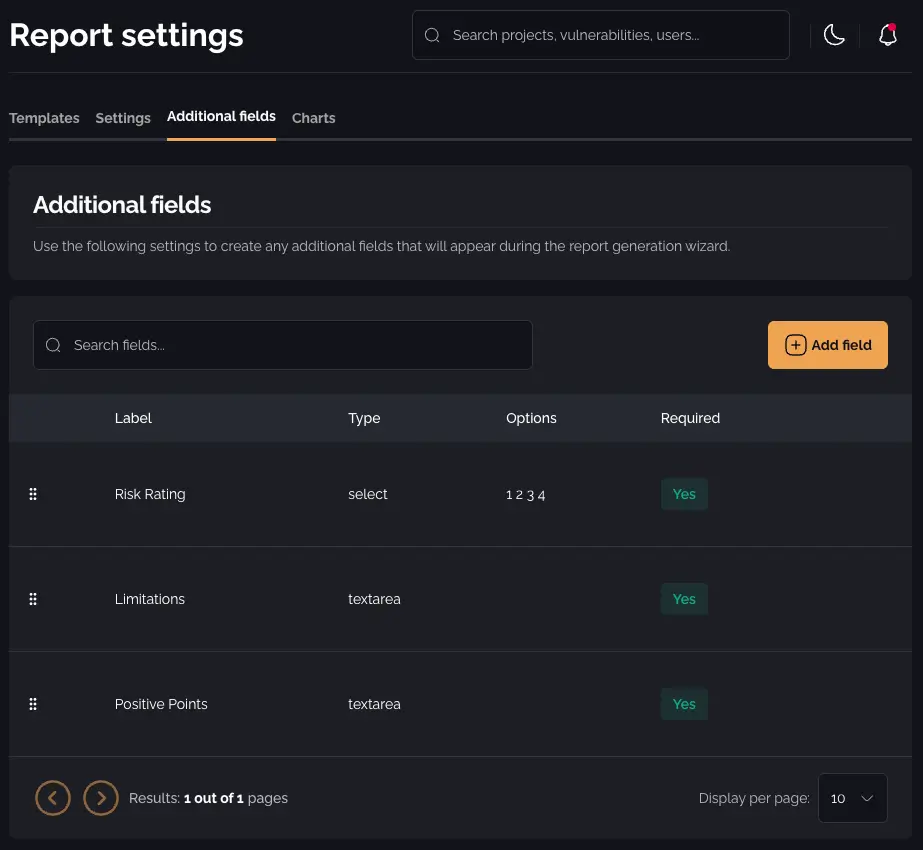
Additional fields
Section titled “Additional fields”In the same way, you can navigate to /admin/report-templates/additional-fields by clicking on the Additional fields in the navigation to see the list of additional fields. You can search them by label, or add new ones by clicking the Add field button which opens a modal where you can input the content. You can also delete and edit existing fields, and reorder them by dragging and dropping the desired row.
Charts
Section titled “Charts”You can also navigate to /admin/report-templates/charts by clicking on the Charts in the navigation to manage the charts that are available in the reports. You can create new charts, edit how they will render vulnerabilities in reports, and delete existing ones.
For more information on using charts in your reports, see the Predefined Charts and Custom Charts documentation.